Wednesday, November 26, 2014

Coloring Vintage Game Stuff: Star Wars and Star Frontiers.

Just a quick post about a couple of pieces I've digitally colored lately. 

The first is an Adventure Square from TSR originally printed on the back of Star Frontiers Miniature blistercards. 

The computer screen says "SATHAR ARE STINKY".

Always with the Dralasites. The place is lousy with them.

The original art.


The second is a FireHawke RepulsorTank from the West End Star Wars Miniatures supplement Imperial Entanglements. I use these pieces to practice my coloring plus it's just fun to revisit this classic art.

With a blue Imperial symbol as per the description in the book. The templates by Stephen Crane, as seen below, are incredibly precise and filled with cool details. The book contains extensive descriptions of the unit markings and other information about this particular unit, the Hell's Hammers.

With a dark Gray symbol, my personal preference.


Friday, November 21, 2014

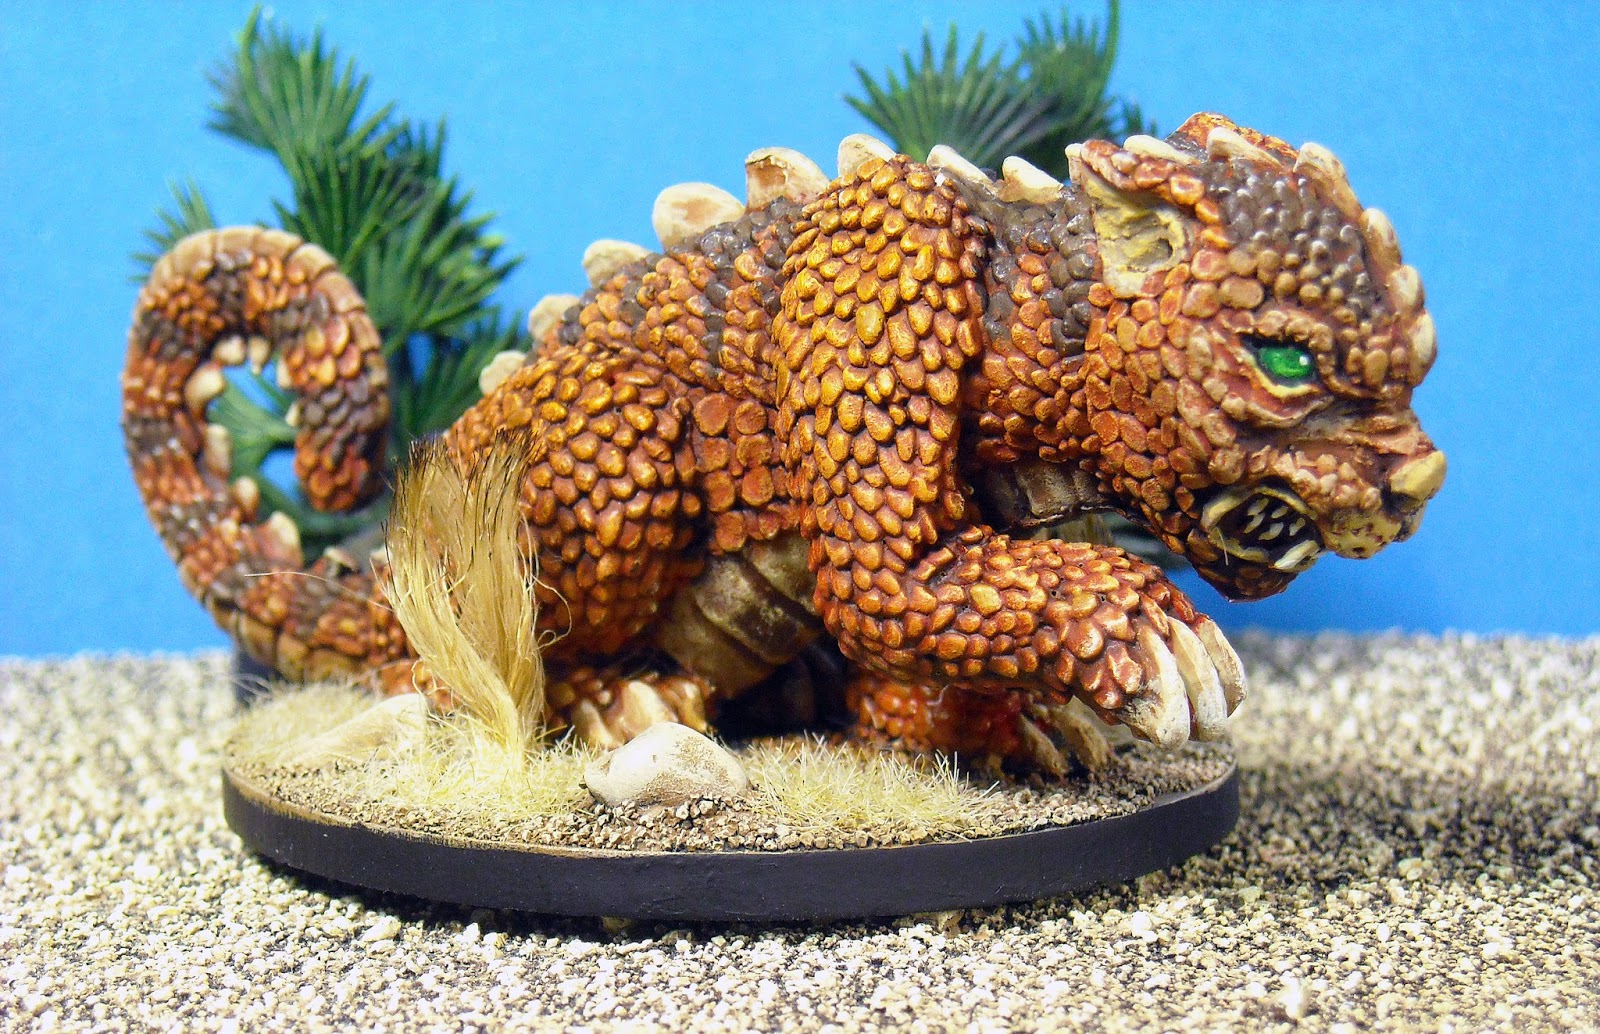
Painted Star Frontiers Megasaurus

Back to the vintage Star Frontiers minis. This time it's the massive, powerful, deadly, but still cute as a button Megasaurus. Mostly damp-brushing and washes for this fellow along with static grass and jute twine weeds for the base. I like this mini a lot but I'm not sure it captures the dread and fear these creatures are supposed to inspire.

Scared yet?


Good thing Dralasites are so chewy.

Monday, November 17, 2014

New Spreadshirt Store from RSquared and Roebeast.

I just added a bunch of new designs to our Spreadshirt Store if you need some clothing to cover your shameful nakedness. Featuring character from RSquared comics and games as well as general geekery.

Check them out here: http://roeshirts.spreadshirt.com/

Yva, Zombie Plague and other favorites plus some new designs!
My tribute to the under-appreciated Destroids of the Macross series.


Whether sitting on the steps of Capitol Hill or sitting on the steps of The Lonely Mountain he's Just a Billbo.

Correct gaming grammar in an easy to remember rhyme.


Friday, November 14, 2014

Painted Robotech Tactics Tomahawk

Finally got some paint on these bad boys and am pretty happy with them. Again, I'm super impressed with the decals for these. The hips and ankles are held together with wire and I'm still not sure how the legs are supposed to be positioned. That would be a great bit of information for the manufacturers to share. Oh, and the bases are so unique that they are DOUBLE BEVELED! 

"Yer a big feller ain't ya?"

Why?

Monday, November 10, 2014

Assembling and Painting a Glaug Officer's Battlepod for Robotech Tactics.

After my misadventures with the first models I tried to put together for Robotech Tactics I decided to switch sides for a bit and build one of the Glaug Officer's Battlepods. This went together pretty well, even though there are still some oddities, and I thought it might be helpful for other modelers to see what I've come across.

The sprue contains one Glaug and one Quel-Regult.
All the parts to make one Glaug.
Bad part design of the little antenna that can't be removed from the sprue without snapping it. I'm leaving these off my finished models anyway since they probably wouldn't survive the trip to play a game.
For some odd reason the upper cannon has an odd hook-shaped joint that needs to be inserted before the two body halves are glued together.
The two halves hold the cannon in place.
The hip joint doesn't allow for any side to side movement and is attached with two flat connections.
How the hip joint fits to the torso. The legs attach to the small arched openings on the side of the hip.


Painting was very basic, quick and dirty. I'm purposely not spending much time on thiese minis but instead trying to keep things efficient while still managed a decent tabletop distance quality level. Flat colors followed by Citadel washes and a bit of highlighting and drybrushing. I went with a classic Zentradi color scheme.

One of the best parts of these kits are the decals. They don't have to be completely trimmed out and they slide off the backing paper pretty quickly. I've had decals from major model-making companies that didn't work as well.

I added sand to the base and although this obscures the markings that show front and rear fields, the tab on the back of the base will keep things lined up.

The decals are excellent.

Next up I'll tackle a few of the Regult pods!