Saturday, April 25, 2015

SKULLS!!! Dragon Forge Design Kickstarter.


From our friend at Dragon Forge Design comes a cool Kickstarter for cast resin skulls. If you find yourself needing extra skulls for bases or minis check these out. Four different designs and pledge levels up to 400 skulls!

https://www.kickstarter.com/projects/dragonforge/skulls-skulls-skulls


Wednesday, April 22, 2015

Less Than a Day to go for Trash Bash Bits.

Less than 24 hours to go for the Trash Bash Bits Kickstarter. These simple and easy to use bits will help transform that stack of interesting plastic and styrofoam that you've been hoarding into super-cool sci-fi buildings for tabletop wargaming.

There are five designs to choose from plus you can add a Carrot Man mini to your pledge 
as well!

https://www.kickstarter.com/projects/847163926/trash-bash-bits-sci-fi-doors


The Dark Empire Door.


The Hive City Door.

The Steel Iris Door.

The Trapjaw Door.

The Window Gunport.

Umbelliferan "Carrot Man".


https://www.kickstarter.com/projects/847163926/trash-bash-bits-sci-fi-doors


Sunday, April 19, 2015

Creating a Pulp Sci-Fi Building Using Papier-mâché


Here's another article that I wrote for Ravage Magazine US. This one was published in Issue #12. Check out Ravage US at www.ravageusa.com

Also check out my first article: Making Wargaming Buildings from Papier-mâché

And have a look at the Trash Bash Bits Kickstarter. I'm making a collection of doors and windows to be used in just this sort of project.

Creating a Pulp Sci-Fi Building Using Papier-mâché 
by
Brian S. Roe


People enjoy model building and miniature painting for many reasons. For some it’s merely an enjoyable hobby that is calm and quiet, something that they can devote a few hours each night to and in the end have a beautiful little work of art to admire. Others play their games with such a competitive spirit that they want their miniatures to be the best as well. And there are some who truly believe that well painted models perform better during the game.

I’m in a different camp. I want to make movies. And playing wargames allows me to come pretty close to that experience. I’ll never forget the Rhino that exploded and flipped over onto Noah Doyle’s Chaos Champion or the volley of flaming arrows that destroyed the lions from Cathy Hamaker’s Khemru Beastmaster. These moments played out on tables that had well painted scenery against opponents who had taken the time to make their miniatures look great. And for those brief moments the tiny world we were sharing was as vast and epic as any Hollywood blockbuster.

With this in mind I’ve been thinking about building some pulp sci-fi buildings roughly based on buildings from pulp magazine covers and from movie serials such as Radar Men From The Moon and Undersea Kingdom. I was also inspired by my pod house build from Ravage #10. The idea of using papier-mâché for more organic forms stuck in my head and so I decided my Valkeeri from Hydra Miniatures needed a hide-out.

Check out my article from here for the basics on using Celluclay papier-mâché for buildings. For the pulp sci-fi building I used large plastic eggs that I found last Easter as well as a small plastic paint bucket to make my basic shapes. These were then cut and glued together using wood-glue. I used more Celluclay to blend the joins between them. I then mounted the whole construction onto an MDF base.

The basic building shape.

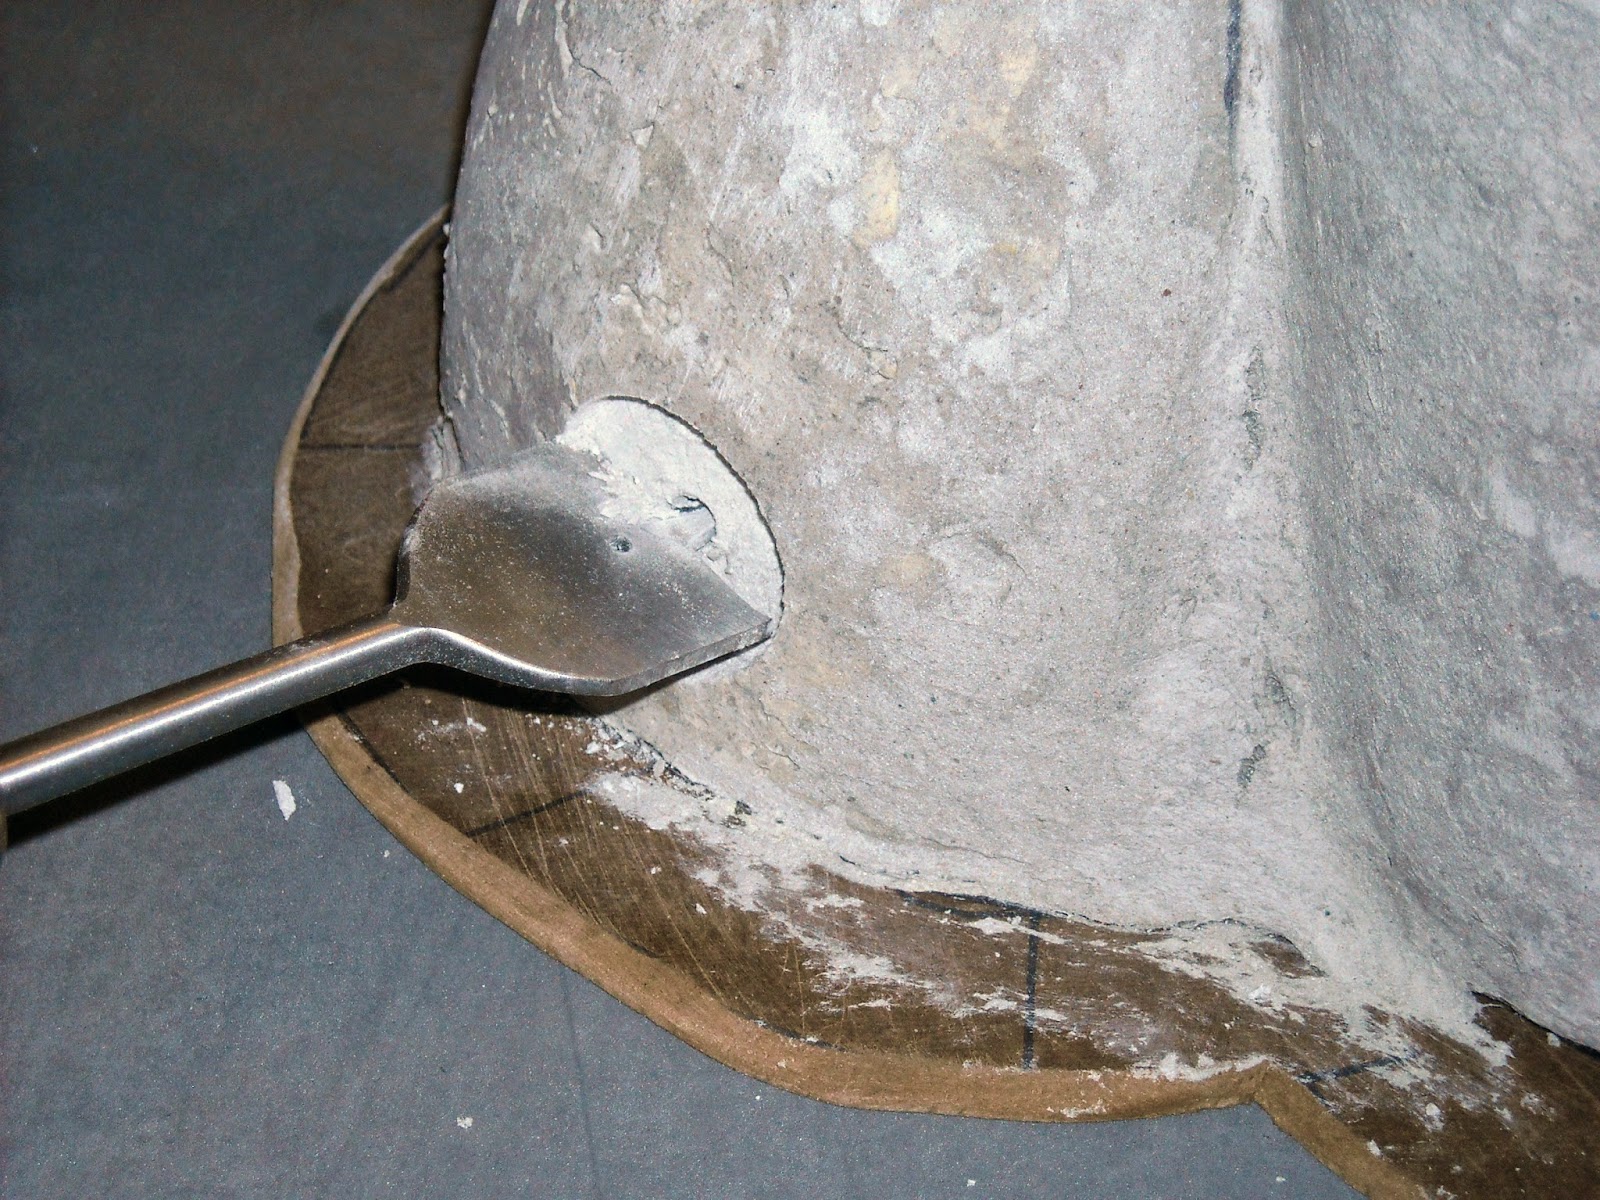
Once everything was completely dry I created two windows and a doorway by drilling portals using a spade type drill-bit. This gives a cleaner result than trying to cut into the shape while it’s still wet.


I then built steps out of foamcore and then coated them in Durham’s Water Putty. Once this was dry I sanded them to shape. Finally I built a door from plasticard and foamcore.


The balconies are made from a smaller egg shape glued to the towers. The archway over the balcony was just modeled with moist Celluclay. I then added a floor for each balcony made from cereal box cardboard. I filled the egg shape with Celluclay and then pressed the cardboard into it. 


I made some ornaments for the tops of the two towers using a small plastic ball ("zombie eyeball” Halloween decorations) thick plasticard and collars cut from plastic tubing. I assembled them with gel type super glue to give them a crude, soldered look. Later I sprayed these with textured spraypaint to make them look like hammered metal. I added pieces of wooden dowel and glued an anchor made from the plastic tubing into the towers. This allows for the ornaments to be removed for storage and the plastic anchors keep the Celluclay from tearing out.


I painted the ornaments to look like weathered bronze.
Styrene tubes keep the papier mache from tearing out when the ornaments are removed.

I added some small hemispheres to the towers to balance the whole design. Finally I added sand and small stones to texture the base.


Painting was standard damp brushing and dry brushing. I use pretty large hog-bristle brushes since I want to get as much coverage as possible. Bristle brushes feather the drybrushing more evenly than plastic bristle house painting brushes. I also use cheap tube acrylics since they are thicker than bottled paints and much more affordable than using miniature paints.

The texture of the papier mache really comes out when drybrushed.
The final building is pretty lightweight and sturdy for it’s size. Although I could have used the plastic pieces that I used for molds to make the final building I love the texture of papier-mâché. And being able to model freeform shapes from the same material really helps as well. Papier-mâché fells very organic and is just fun to work with. It’s a material that I respond well to and one that allows my imagination to run free. I hope it works that way for you as well.

“Who knew that there were dames on the moon!? Especially dames with guns!” Miniatures by Hydra Miniatures and Ars Minima. Paper Juggernaut by Mayhem in Paper.

Wednesday, April 15, 2015

Making Wargaming Buildings from Papier-mâché

Here is an article that I wrote for Ravage Magazine US in 2013 and have decided to share here with Ravage's blessing. It was originally published in Ravage US issue #10. Find Ravage at www.ravageusa.com. It's a great magazine full of games, exclusive scenarios, and high end wargame modeling and miniature painting.

With my recent Trash Bash Bits Kickstarter wrapping up I thought it'd be cool to post some of my stuff to inspire you to make your own creations. This is the sort of project that inspired me to create Trash Bash Bits in the first place since I was tired of having to find doors and windows to work with my models.

Enjoy!

Making Wargaming Buildings from Papier-mâché
by Brian S. Roe

Gangers from the Necro-Mags take on a cargo walker outside of a scientific research bunker. Miniatures by Reaper, Mongoose, and NotNorm.
Papier-mâché was an ubiquitous part of my elementary school years and something that I’ve always taken for granted.We used it for piñatas, masks, and all sorts of craft projects. Although I remember seeing some beautiful railroad layouts created with papier-mâché when I was a kid, I’ve never thought about using it for making buildings and terrain to play games on until a couple of years ago. 

I had found some cool plastic containers and wanted to use them for buildings. But the thin plastic was too weak to hold up to serious gaming so I thought of filling them with papier-mâché to strengthen them. Instead I ended up pulling the papier-mâché out of the molds and really liked the way that it looked, like rough, cast concrete. I then started collecting molds to create basic shapes that I could then enhance with other materials like model kit parts, bits of toys, and other more traditional terrain making supplies. Papier-mâché cast in this way resembles cast concrete and can be used for bunkers, defensive fortifications, and futuristic buildings.
Celluclay and various molds.
The type of papier-mâché that I use is a pre-made powder called Celluclay. It is made up of paper pulp and a powdered glue that activates when mixed with water. If you can’t find a pre-made type of papier-mâché you can make your own out of newspaper.

To mix Celluclay use a bucket or large bowl that is not overly precious as this stuff can make a real mess of family heirlooms. Add a handful of Celluclay to the bucket and slowly pour in a bit of water to moisten it. I’m always surprised by how little water I actually need to form useable papier-mâché. And the less water you use now the faster your finished piece will dry. 

Work outside if possible and wear a dust mask when pouring and mixing.
Stir the Celluclay slowly with your hand until the papier-mâché comes together. It should be well mixed with no lumps and it should be fairly dry. If it feels too moist add a bit more powder and work it into the lump.


You can use various plastic items for molds. Food packaging like those used for meat, mushrooms, or noodles work well for bunker type buildings, domes like those from whipped cream topped coffee drinks make great hemispheres. One of my favorite molds is from a microwave Christmas pudding because it is slightly heat resistant and can be put into a very low oven to speed drying.

Once you’ve chosen your mold start working the papier-mâché into the corners and crannies of the mold. Use your thumb to push out any air bubbles that get caught. The more time you take with this step the fewer pits you’ll have in the final piece. Finally, smooth the inside of the piece so that all of the casting is the same thickness. This will help the piece to dry evenly and prevent warping.


Leave the piece to dry for at least twelve hours before you attempt to remove it. This will allow the inside to form a skin of drier papier-mâché and make the whole form more sturdy. Leaving it for a couple of days will guarantee that the piece is firm enough to de-mold. Now put the mold into your freezer for at least four hours. This will freeze the papier-mâché and allow you to de-mold. Now put the papier-mâché piece onto a piece of cardboard and put it back into the freezer without the mold. This will begin to dry the other side of the piece without allowing the piece to warp as it thaws. Leave it overnight.

Hard frozen papier-mâché just out of the freezer.
Now take the casting out of the freezer and let it thaw and dry. You can speed this up by placing it in a very low oven with the door slightly opened water vapor to escape. This can take several hours depending on how thick the piece is.

When the piece is totally bone dry you can sand it and add various extra bits to it.
Cardboard, plaster and wooden additions can be glued on with wood glue. Use CA glue to prep the papier-mâché when adding plastic pieces. This creates a hard surface for the CA glue to adhere to and strengthens the bond.

First coat papier-mâché with CA glue and then when dry use more glue to adhere the plastic piece.

Additional parts from Hirst Arts molds, Black Cat Bases and Pegasus Hobbies Platformer sets.
You can use plaster or more papier-mâché to fill in holes or make additions to the basic shape. You can also glue together two or more finished shapes and then fill in the gaps with more papier-mâché. This can create very biological, organic shapes such as these Roger Dean inspired pod houses.


Pterro-Man from Forge of Ice. 

Glue the final piece to a piece of masonite with woodglue and texture this with sand to make a base. Give the whole piece a good primer coat of flat spray paint and paint like you would any other building. The texture works really well when drybrushed. A good coat of varnish will help to protect it, I usually use gloss first and then flat.


Primed in basic flat black.
The texture of papier-mâché is great for drybrushing.

The finished science bunker.
The contrast between different types of materials adds to the visual interest and realism.
Papier-mâché is a very versatile material and makes strong, lightweight pieces affordably but not necessarily quickly. But working with it is enjoyable and it’s a pretty forgiving material since part of its charm is the rough unfinished look it has when dry. Give it a shot and good luck!
 Even without a lot of extra bits this bunker looks heavy and solid. Elder Things attack UTC exo-troopers on Proxima Tau. Miniatures by Nameless Design.

Thursday, April 9, 2015

Trash Bash Bits Design #5: Window Gunport

A combination of high-tech window and gunport allows defenders a clear view as it gives them ability to fire weapons from within the safety of the building. The multi-layered window panes are easily replaceable after battle and contain small static generators to repel dust and dirt.

(Please notice that each casting of the Window Gunport makes two windows but counts as one door for the purposes of this campaign.)


https://www.kickstarter.com/projects/847163926/trash-bash-bits-sci-fi-doors/description


Monday, April 6, 2015

Trash Bash Bits Door Scale.

Here's a quick graphic to give you an idea of the sizes of the Trash Bash Bits sci-fi doors. 

Miniature shown for scale only.
Check out the Kickstarter!

Steel-Iris Door for Trash Bash Bits.

The newest door to be unlocked for the Trash Bash Bits Kickstarter is the Steel-Iris door.


This is a classically simple sci-fi design and one that can be used for many different settings. The sharpened steel petals open and close with hissing whispers and the constant threat of horrible malfunction.


Friday, April 3, 2015

Using Trash Bash Bits Trapjaw Doors for Space Hulk.

Just a quick post to show how I designed the TBB Trapjaw Door to be glued back-to-back for games like Space Hulk. The wider base allows them to stand up without need and additional base.

Check out the Kickstarter here and help us unlock the Trapjaw!

https://www.kickstarter.com/projects/847163926/trash-bash-bits-sci-fi-doors

Miniature shown for scale only.


Thursday, April 2, 2015

Trash Bash Bits Now on Kickstarter!


If you're like me you get tired of trying to find suitable technological bits like doors, windows, and hatches when making gaming scenery. Trash Bash Bits solve this problem by being easy to use, light, and affordable. They are flat on the back and thin enough to look good when glued to the outside of buildings.


Check out the first three doors below and help me out on Kickstarter!


Miniatures shown for scale only.