Thursday, October 25, 2012

Trash Bashing a Sci-Fi Vehicle From Start to Finish: Part 3

Final Painting! After gluing a bunch of stuff together it's time for the magic to happen. When I prime a new trash bash project I often forget what it was made of in the first place. The primary colored plastic melds into one cohesive object that can then be painted without any concern for what the parts began as. Quite simply this step makes me happy. 

I tend to prime all of my terrain and vehicles black as it makes for easier painting overall. Even if I'm painting something red or yellow I prime black and then drybrush the colored areas with white. This makes shading much easier for me since I use dampbrushing to add my colors, especially on a big, clunky vehicle like this.


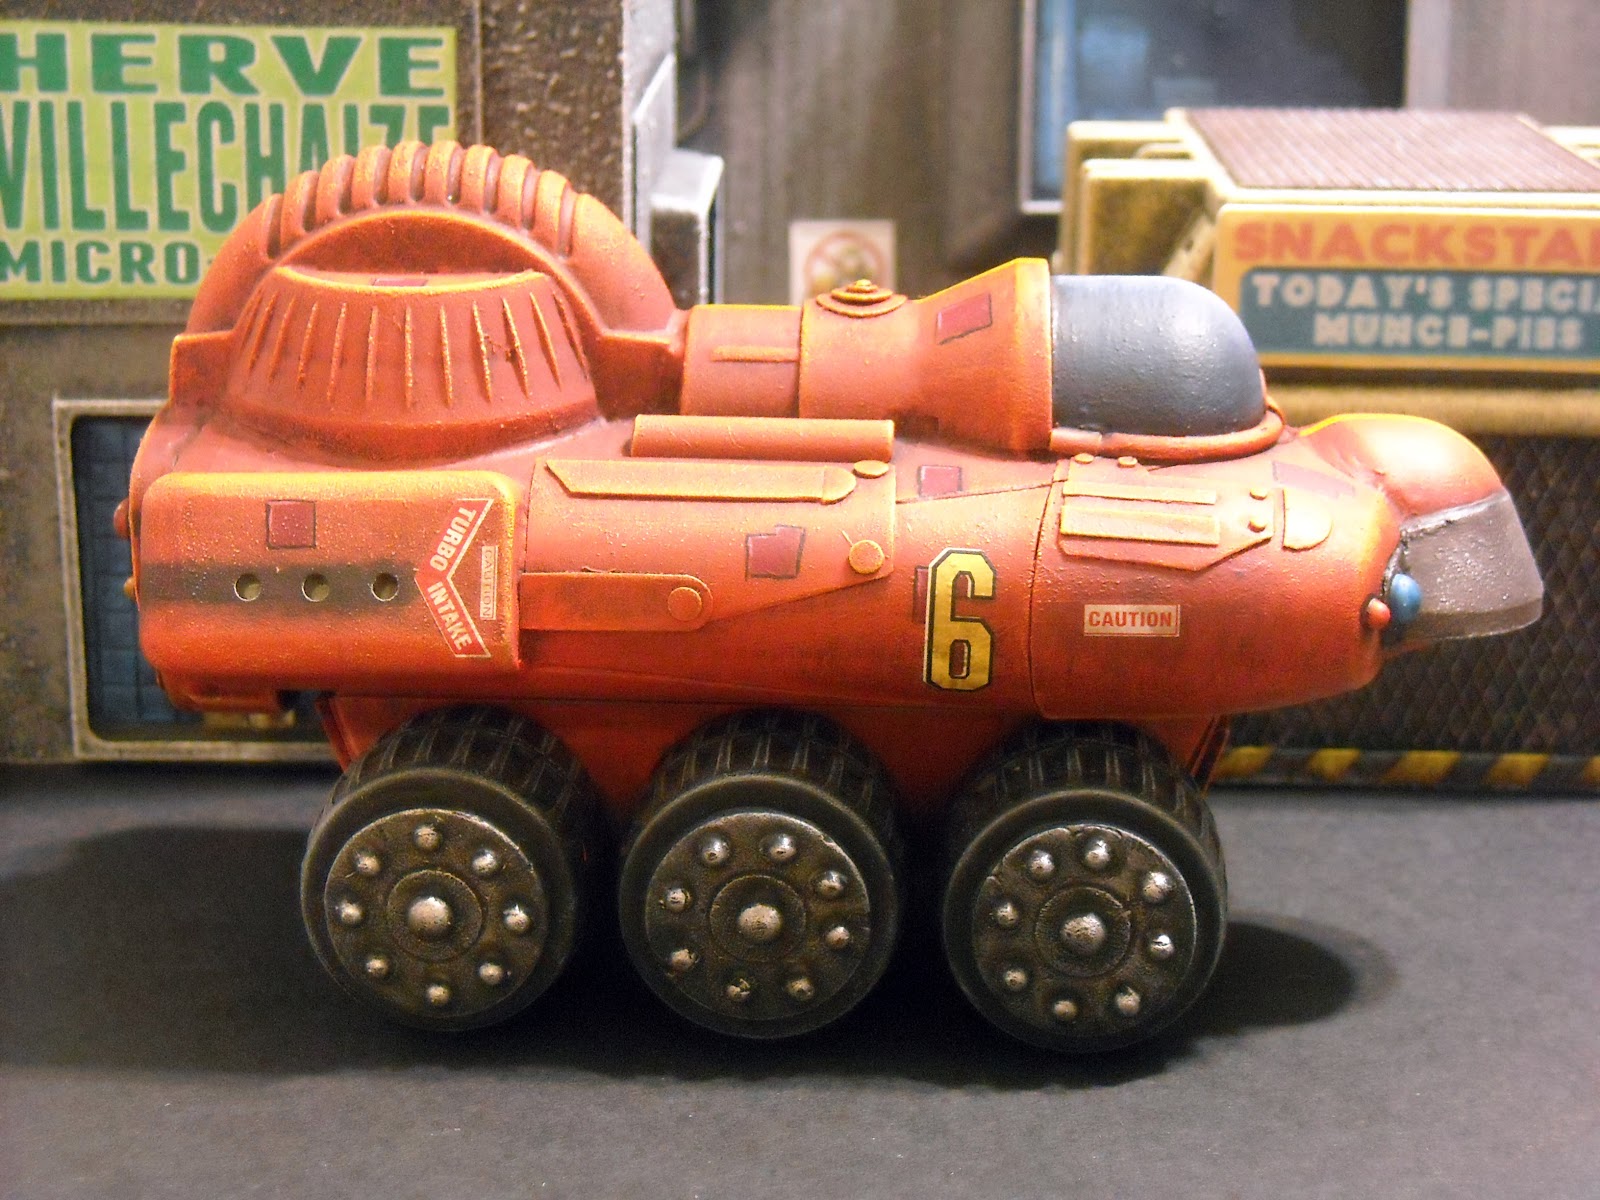
Once the primer was totally dry I went over the main body with dark red and built up the color by layers, finally ending with very pale red/orange. All of the metal parts were repainted black and then layered with dark metal and finally lighter silver. I added some "Chris Foss" panels to break up the surface and to add more visual interest. The windshield was painted with a gradient to imply transparency and the various lights were painted using the standard gem technique.

I used rub on transfers from the Pine Car Phantom set and a yellow racing stripe to correspond with the yellow number 6's on the sides. The transfers were varnished with Testor's matt varnish and allowed to completely dry. Then I used various Citadel washes to dirty everything up. I added some dark soot along the exhausts by drydrushing dark gray. finally I finished the tires by drybrushing them with gray. I kept the upper body separate from the wheelbase to make this step easier.

Once it's all painted and dry I used a gloss varnish and then the Testor's flat varnish, standard operating procedure for most of my stuff.

Some perps never learn.
So that's it! The Bates Industries Roadpig DX is now ready to hit the mean streets of Mega City 1. I hope you've enjoyed this article and that it inspires you to start collecting and gluing together your own fleet of vehicles. Remember that Trash Bash 2013 will be happening next year so start saving your greeblies! 


Sunday, October 21, 2012

Shoggoth Jack-O-Lantern

Tekeli-li, tekeli-li...
With Halloween just around the corner I decided that I needed a jack-o-lantern on my porch. I wanted to make something that looked like a shoggoth, Lovecraft's vile slave race so I knew I'd be looking for the most gnarled, warty gourd I could find. I collected several type of eyeballs from the craft store and then went pumpkin shopping.
I found a lovely specimen of Cucurbita maxima 'Brodé d'Galeux Eysines', locally known as a Peanut Pumpkin. This would be my shoggoth. I came home and quickly painted the large eyeballs which were unpainted plaster and then set about trying to carve several perfectly round holes for the eyeballs to fit into.

Inspiration flashed and I grabbed my power drill and some spade drill bits. They tore through the pumpkin with no hesitation and although messy saved me a huge amount of carving time. I placed all of the eyeballs and then drilled a mouth towards the bottom. Voila! The ugly little blighter was finished. Next year I think I'll make a beholder.


This was way too much fun,

Eyeball! Eyeball!
This has already started creeping out the neighborhood kids.

Friday, October 19, 2012

Trash Bashing a Sci -Fi Vehicle From Start to Finish: Part 2.


Now it just comes down to gluing and puttying everything into a nice solid mass. You can see here that I also used various thicknesses of styrene sheet to add panels, a door in the back, and other details. Now is when the real fun of trash bashing starts. Try to get a good overall amount of detail without leaving one area too sparse while overloading another. Although sci-fi vehicle design is often more whimsical than functional try to think about what your vehicle needs and what certain parts can represent. 

The Bates Industries Roadpig DX.
I use primarily cyanoacrylate glue but occasional epoxy glue when required. Milliput yellow-grey is used to fill gaps and sculpt details, like the seal around the cockpit bubble, that I can’t find good bits for. Milliput seems to work better for this than any other modeling putty since it sticks pretty well and can be smoothed with water before sanding once it’s cured. I’ve found that wetting the area that I’m going to apply it to helps it to stick better while trying to blend joins and transitions. 

The rear door, leading to storage and the engine compartment, is scratchbuilt out of styrene. The taillights are plastic hemispheres that I found in the craft section. They usually come with an adhesive on the back but I scraped this off to make sure that super glue would stick. They are based on circles of styrene punched out using a bunch of various sized punches that I’ve collected.

Try to add several layers of detail to heighten visual interest.
For the wheels I used soda caps with their edges sanded smooth and then glued in pairs. The axel housing is just a hunk of balsa wood covered in sheet styrene. I carved out an indentation in the top to allow the rounded container to fit snugly on it. I use balsa wood to build forms like this since it’s quicker than trying to build a whole shape out of styrene and it’s much stronger as well.


A twelve-pack of Diet Mountain Dew gave its life so that this car could roll.
The hubcaps are made using Insta-Mold from Cool Mini or Not. This is a very useful low-temp melting silicone that allows you to make simple castings. I made a master part using a washer and some of the craft hemispheres. These were then cast using various putties. This gives a more regular feel to the piece and is much easier than trying to scratchbuild each part.


This stuff is great for making multiple copies of that one really neat greebly that you only have one of.
All of the parts are glued on and puttied I usually go over it again with medium grit sandpaper before painting. Then I go over it lightly with a damp paper towel to get rid of the worst of the sanding dust. 


Wednesday, October 17, 2012

Trash Bashing a Sci -Fi Vehicle From Start to Finish.

Well here we go again. I swore I'd never make another deodorant container vehicle but I went and did it anyway. And this one gave me some ideas for another one. I'm glad summers in Indiana are hot and humid so I can build my stash of raw materials. To revisit my previous trash bash vehicle check here.

This is going to be a road car primarily for Mongoose's Judge Dredd Miniature Game and Gangs of Mega City 1. Big vehicles are great additions to a game as they can be used as terrain, targets, objectives, or combatants. They can remain stationary or be moved each round to create a dangerous traffic pattern that models must maneuver around. Plus they just add to the visual appeal of a futuristic city.

I'm going with a very 1980s style here, big and chunky. This style suits itself to this method of model building since it allows for more cartoony bits to be used. As Diego Diz showed in last year's Trash Bash contest a more finely detailed look can be achieved but he's better at this stuff than I am. 

Diego's winning entry for Trash Bash 2012.
So the first question is what kind of junk to use. Pretty much any reasonably hard plastic can be glued and painted. The softer stuff seems to be more of a problem, shampoo and dish-soap containers and the like, and ping-pong balls are usually a nightmare to cut and glue. But by trial and error combined with cussed determination you can usually find a way to make the best stuff work.
This is how hoarding starts.
The main body of my vehicle will be made from the classic form of an Old Spice Antiperspirant container. After pulling it all apart I scrubbed the parts that I wanted to use with heavy duty de-greaser and then ran them through the dish washer to remove any of the waxy deodorant. Then I scoured the whole part with medium grit sandpaper to help gluing and painting later on.

It’s at this point that I started to design the vehicle in my head. Maybe some quick sketches. Maybe just stacking other parts onto the main body to get an idea of the final shape. Unless you’re trying to replicate an existing design this style of modeling can be very organic and ever changing. Sometimes a shape just won’t work out and needs to be left off. Sometimes one addition will inspire you to add another, and then another. Often the hardest part is knowing when to quit gluing stuff to other stuff.

Some of the parts will need cut up or otherwise modified to fit correctly. I use a Dremel tool and a cutting wheel to quickly hack through the plastic but be careful! You can also use razor saws but I’d avoid hobby or utility knives for most heavier cutting. I used a fine line permanent marker to mark the piece before cutting. Once the cut was made I used sand paper to clean the cut and also to scour the surface. It’s usually easier to sand the surface of each part as you prep it rather than waiting until the whole piece is assembled.


Some parts can be simply disassembled into two equal parts. Toys and model kit parts are often great for this since they are cast in two halves. Micro screwdrivers are often useful to take apart toy parts or other bits like this candy container top.

This capsule, from a Kinder Egg-like candy, will be used to make the driver's cockpit. Here you can see the mess left by the rotary tool and the piece after being sanded and cleaned up.
Since this vehicle will be driving around the mean streets of Mega-City One I tried to make it look solid and give it the comic book design sensibility of 2000 AD stories from the late 1980s. This means big chunky tires and a ridiculous sense of “road bully” attitude.

I usually start by seeing how parts start to fit together and then adjust the overall design based on these sub-assemblies. You’ll be amazed at how well some pieces fit together, almost as if by purposeful design.

Now is when the final design starts to coalesce. You can use blue-tac to temporarily attach parts to get a better idea of what you want before gluing everything down. Train yourself to forget what these bits once were but instead what they look like scaled down. See them only as the plastic forms they are and not as yesterday’s mint container.

Tuesday, October 16, 2012

Warbot Battle Trooper Mk IV.


It's been a while since I've been able to revisit the Grenadier Miniatures Warbots by John Dennett but I've finally had a chance to finish the Battle Trooper Mk IV. This little fella is pure vintage sci-fi, from his globe-like head to the flared legs. For a warbot meant to fight alongside or against mecha like the Destro Walkers he seems to be lacking a bit in the size department. However the weapon load out of a laser rifle and what I imagine to be some sort of particle cannon implies that while the Battle Trooper might not be able to soak a lot of damage it can deal out plenty.

Like the other Warbots this mini was designed to be used with micro-armor scale games but it also scales up or down really well. With 6mm minis it looks like an imposing, man piloted battlemech. For 15mm and larger it starts to look more like a vintage patrol-bot, designed for use in large numbers and computer controlled. It is a simple design that can be used in a variety of systems and could easily be modified or kit-bashed.

These are currently available from Mirliton in a pack of three minis.


Troops by Rebel Minis.

Trooper conversion using a Wargames Factory Greatcoat Trooper.